Writing programs for the badge
The Fri3d Camp badge runs MicroPythonOS, a lightweight operating system for microcontrollers whose applications are written in MicroPython.
With the browser-based Fri3d-IDE, you can write code, manage files on the badge, run programs, export apps as MPK files, and publish apps to BadgeHub.
Python experience helps, but is not required
MicroPython is very similar to regular Python. When you are new to programming, start by making small changes to an existing example.
What is MicroPythonOS?
MicroPythonOS is an app-oriented operating system built around MicroPython. Features such as settings, Wi-Fi, updates, and the App Store are provided as applications.
An application can, for example:
- display text, buttons, and images;
- respond to touch input;
- read sensors and expansion boards;
- store data;
- connect to a network;
- work with other parts of MicroPythonOS.
More information:
- MicroPythonOS documentation
- Applications overview
- Creating an application
- Built-in applications
- MicroPythonOS App Store
What do you need?
- a Fri3d Camp badge running MicroPythonOS;
- a USB cable that supports data transfer;
- a computer with a supported web browser;
- the Fri3d-IDE.
Not every USB cable transfers data
Some USB cables can only charge devices. Try another cable when the badge is not detected.
Connecting the badge
- Connect the badge to your computer over USB.
- Open the Fri3d-IDE.
- Click the button to connect a device.
- Select the serial port belonging to the badge.
- Allow the browser to access the device.
After connecting, you can inspect the files on the badge and run MicroPython code.
Note
Close other programs that use the same serial connection. A serial port can normally be opened by only one program at a time.
Running standalone MicroPython code
For a quick test, create and run a simple Python file:
This is useful for:
- learning Python syntax;
- testing small pieces of code;
- experimenting with hardware and sensors;
- investigating error messages.
A standalone script does not automatically appear as an application in the MicroPythonOS launcher.
Creating a new application in Fri3d-IDE
Open the Fri3d-IDE, connect your badge, and find Create New App in the app overview.
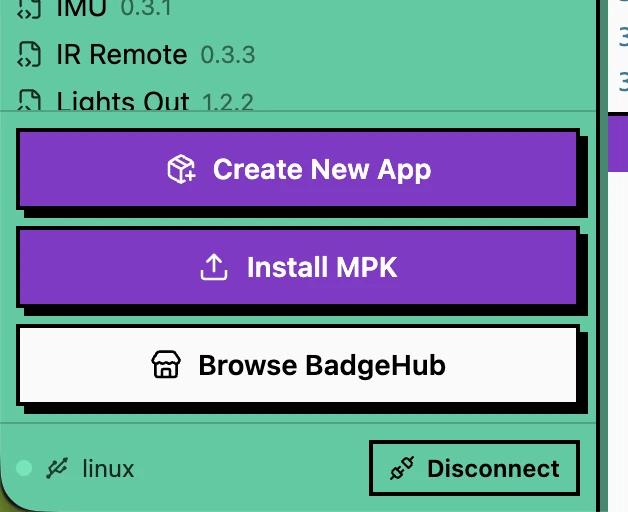
Click Create New App. Fri3d-IDE opens a form for the basic application information.
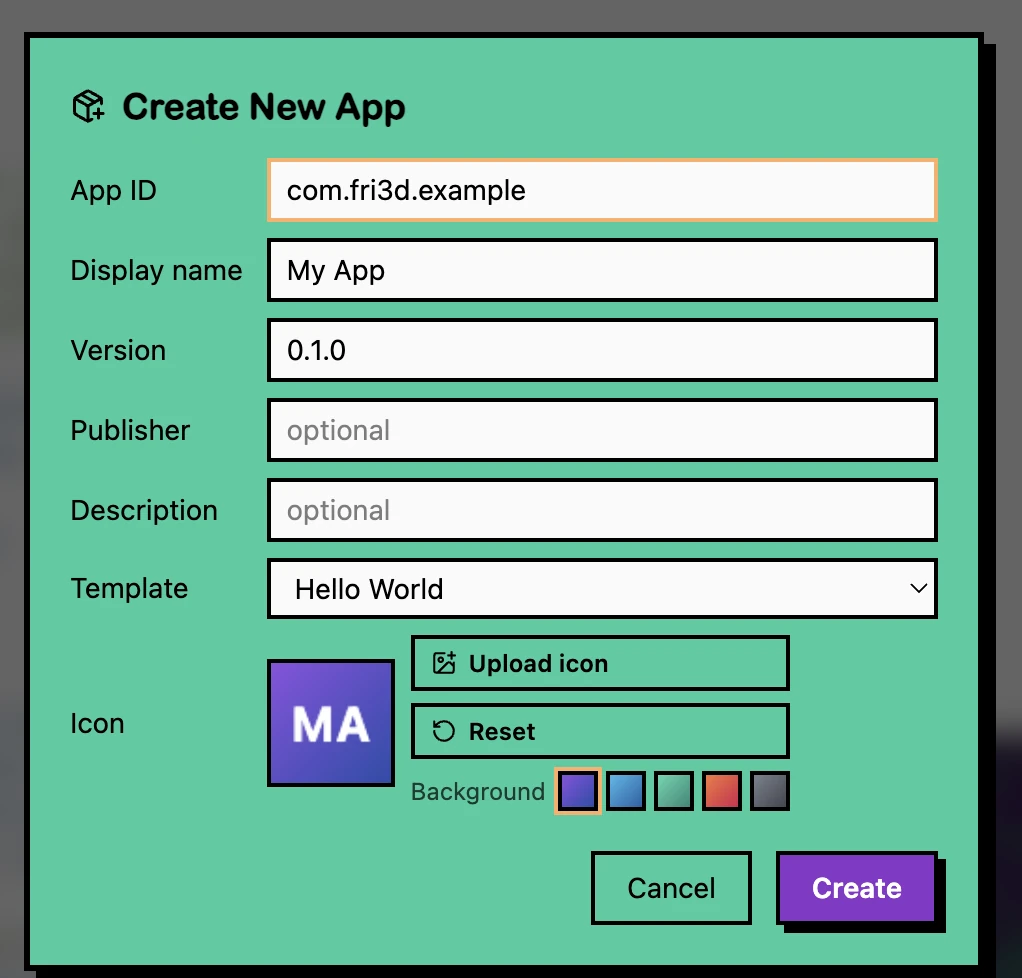
Complete at least these fields:
- App ID: a unique technical name, such as
be.fri3d.lightgame; - Display name: the name shown in the launcher;
- Version: start with a version such as
0.1.0; - Publisher: your name, group, or organisation;
- Description: a short explanation of the application;
- Template: choose Hello World for a first project;
- Icon: upload your own icon or use the generated icon.
Click Create. Fri3d-IDE creates the project files and opens the new application.
Use a permanent App ID
The App ID identifies your application on the badge and in app stores. Do not change it after you have shared or published the application.
Application structure
A MicroPythonOS application normally contains a manifest, an icon, and one or more Python files:
The directory name is the unique identifier of the application. Prefer lower case letters and dots, for example:
Refer to the current MicroPythonOS documentation for the supported manifest fields and application structure:
Creating a MicroPythonOS application
Testing the program
A useful development cycle is:
- edit the code in Fri3d-IDE;
- save the file;
- copy or synchronise it to the badge;
- run the program;
- inspect the output and any errors;
- improve the code and try again.
Work in small steps. When you make many changes at once, it becomes harder to identify which change introduced a problem.
Exporting the application as an MPK file
You can save a local copy of the application as an .mpk package. Open the
application and click the download icon in the app toolbar.
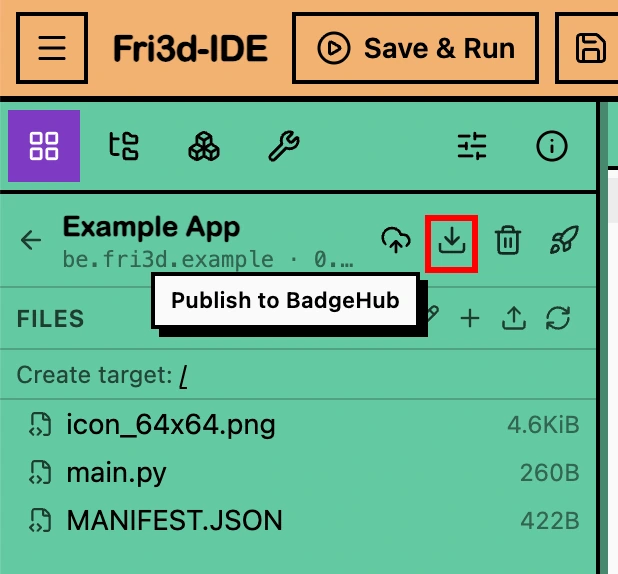
The highlighted button downloads the application as an MPK file to your computer. Keep this file as a backup, share it directly with another user, or install it later with Install MPK in Fri3d-IDE.
Keep the source files too
An MPK file is convenient for distribution, but your editable source project should also be stored on your computer or in a Git repository.
More information:
Publishing the application to BadgeHub
You can publish an application directly from Fri3d-IDE to BadgeHub. You do not need to upload the MPK manually through the BadgeHub website.
Open the application and click the cloud icon labelled Publish to BadgeHub.
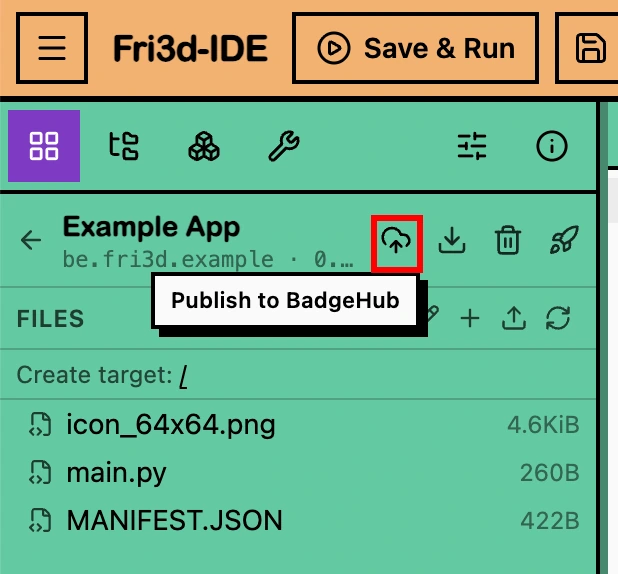
When you are not signed in, Fri3d-IDE asks you to log in with your BadgeHub account.
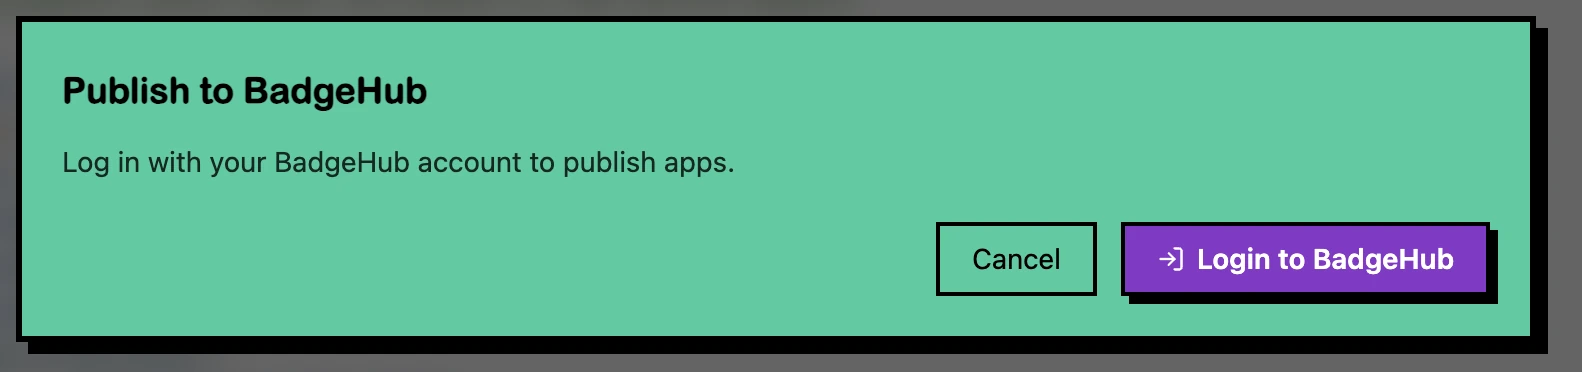
Click Login to BadgeHub and complete the sign-in process. Fri3d-IDE then opens the publishing form.
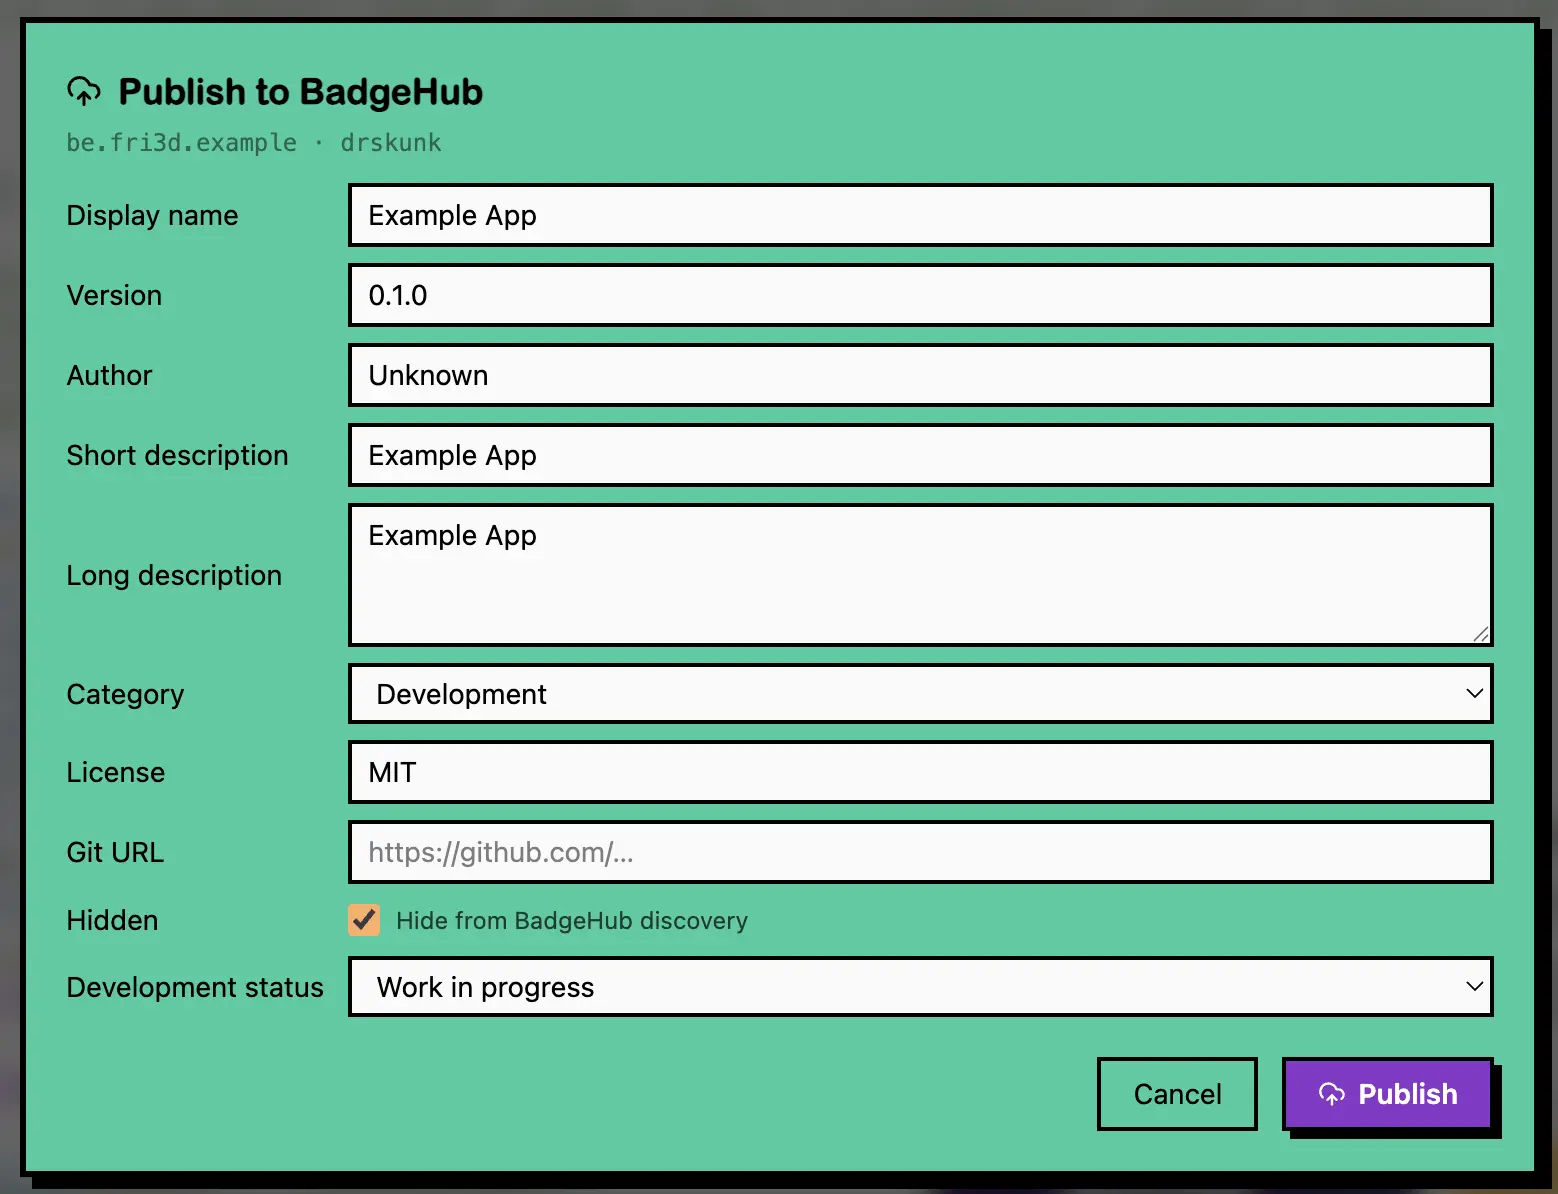
Complete or verify:
- the display name;
- the version number;
- the author or publisher;
- the short and long descriptions;
- the category;
- the licence;
- the source-code URL, when available;
- whether the app should remain hidden;
- the development status.
Publish a new version only after increasing its version number.
Publish the first test version as hidden
Keep an early release hidden and mark it as under development. Test that it installs and starts correctly before making it public.
Always increase the version number
BadgeHub and the MicroPythonOS App Store can only recognise an update when the new release has a higher version number.
More information:
Understanding errors
When a program does not work, first check the Fri3d-IDE console.
An error message normally contains:
- the file in which the error occurred;
- the line number;
- the type of error;
- a short description.
For example:
This means that message is used before it has been created, or that its name
contains a typing error.
Indentation
Python uses indentation to mark code blocks.
Incorrect:
Correct:
Invalid JSON
Invalid:
Valid:
Limited memory
Microcontrollers have less memory than an ordinary computer. Large images, long lists, and many open screens can cause problems.
Try:
- using smaller images;
- removing unused objects;
- loading files only when needed;
- restarting the badge;
- testing the program in smaller parts.
Good practices
Keep a copy on your computer
The badge should not contain the only copy of your project. Keep the source code locally or in a Git repository.
Use version numbers
For example:
A common format is:
Test without a network
An application should respond clearly when Wi-Fi or an internet service is unavailable.
Account for limited hardware
Avoid unnecessary background work and long blocking loops.
Show useful errors
Display an understandable message when something fails. A console error alone is often not enough for ordinary users.